Best trolling motor mount for a kayak
So, you're eyeing that quiet, efficient electric thrust for your kayak, aren't you? It's a fantastic idea, really, especially when you're trying to hold position against a gentle breeze on Lake Fork or stealthily approach a school of redfish in the Galveston Bay flats. But then you start looking at how to actually attach that trolling motor to your beloved kayak, and suddenly, it feels like you've stumbled into a DIY project worthy of a naval engineer. The sheer variety of mounts, the conflicting advice, the worry about drilling holes in your perfectly good boat – it's enough to make anyone just want to grab a paddle and call it a day.
Trust me, you're not alone in feeling a bit overwhelmed. Choosing the best trolling motor mount for your kayak isn't always straightforward, but it's a game-changer once you get it right. This guide is here to cut through the confusion, break down the different options, and help you pick the perfect mount so you can spend less time scratching your head and more time silently gliding across the water, chasing those Texas giants.
Understanding Kayak Trolling Motor Mount Types
When you decide to add a trolling motor to your kayak, the first hurdle is figuring out where and how it'll even attach. Unlike a traditional boat with a built-in transom, kayaks are a different beast entirely. They come in all shapes and sizes, and what works for one might not work for another. That's why there are several main types of mounts, each with its own advantages and quirks.
Transom Mounts
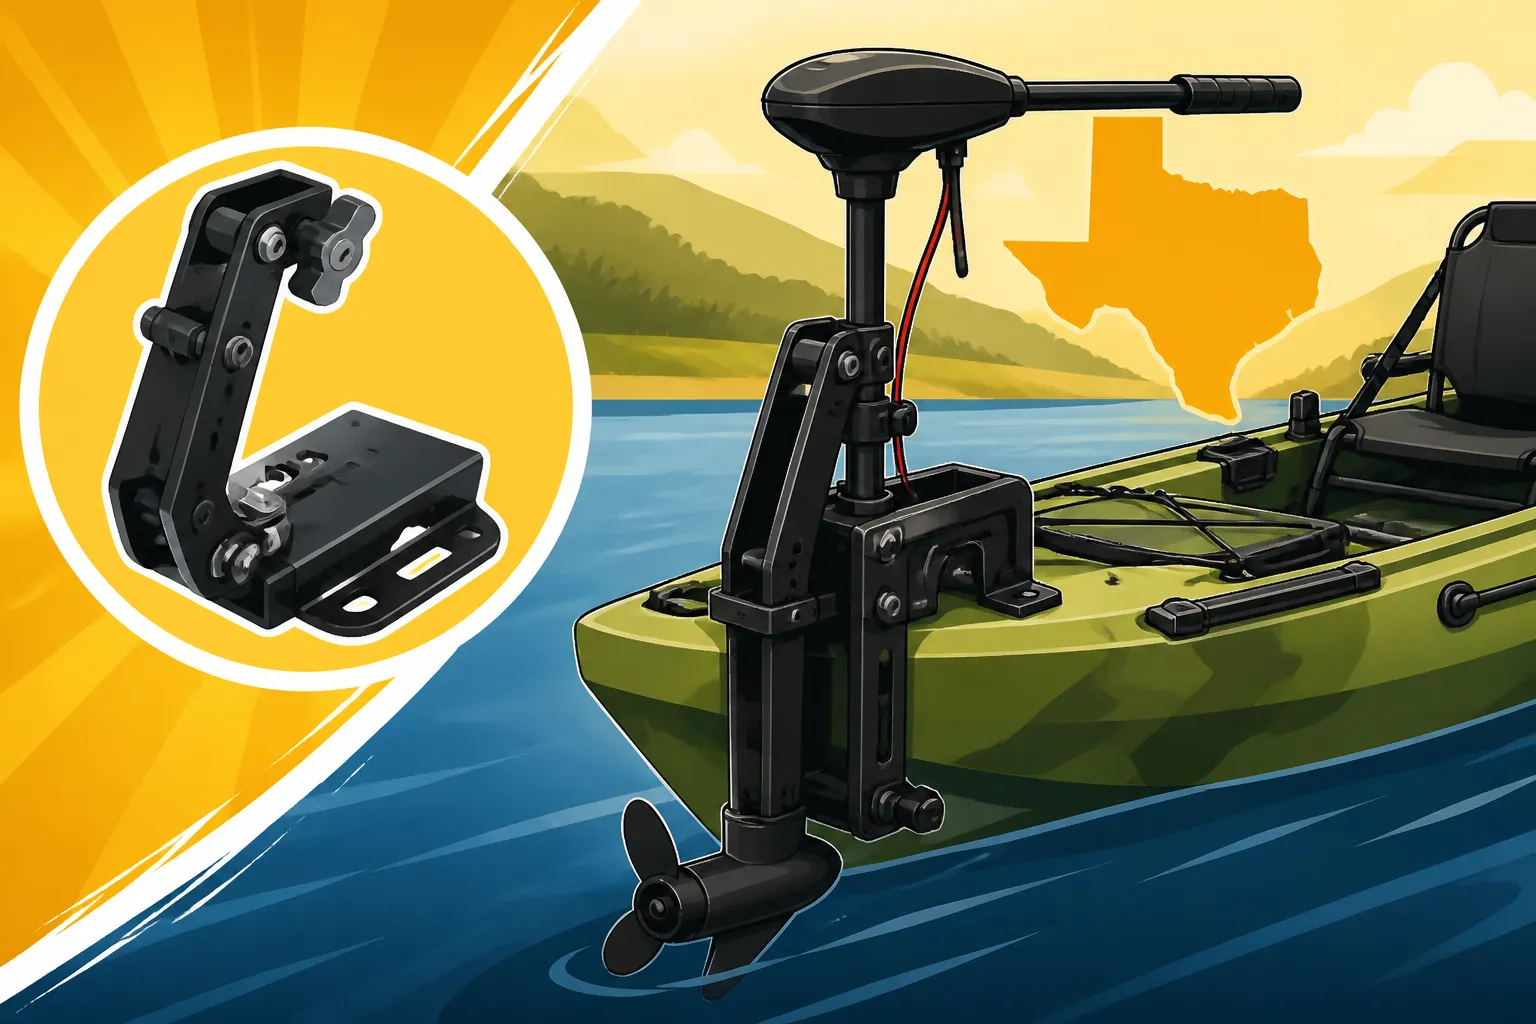
This is probably the most common and often the most straightforward option, especially for many recreational kayaks. A transom mount essentially creates a small, sturdy "transom" at the very stern (back) of your kayak, mimicking a traditional boat. Your trolling motor then clamps onto this bracket, just like it would on a jon boat or a small skiff.
You'll typically find these mounts either as part of a kayak's factory design, like on some Old Town or Wilderness Systems models that have a flat stern plate, or as an aftermarket accessory. These mounts often extend out from the stern, keeping the motor relatively clear of your paddle stroke. The motor's tiller handle is usually within easy reach, allowing for manual steering. The great thing about these is their simplicity; most standard transom-mount trolling motors are designed to easily clamp onto these. However, depending on your kayak's rudder system, a transom mount might interfere slightly, requiring some adjustments or a specific mount design that accommodates it. Also, having the motor at the very back can sometimes make weight distribution a bit tricky, especially if you're a lighter paddler or carrying a lot of gear. But for basic propulsion and ease of installation, they're often a solid choice.
Side Mounts Gunwale Mounts
Imagine attaching your trolling motor to the side of your kayak, usually near the cockpit or just behind it. That's what a side mount, or gunwale mount, does. These mounts often clamp directly onto the gunwales (the top edge) of your kayak or secure to a track system if your kayak is equipped with one, like many modern fishing kayaks.
The big appeal of a side mount is that it frees up your stern and bow. This can be particularly useful if your kayak has a complex rudder system at the back or if you want to keep the bow clear for fishing techniques like sight casting. With a side mount, the motor is typically positioned more centrally, which can offer a different steering dynamic. Some anglers prefer this as it keeps the motor controls closer to them, making fine adjustments easier without having to twist around. The downsides can include the motor being somewhat in the way when you're paddling manually, and depending on its placement, it might not offer the most efficient thrust due to prop wash or alignment. However, for smaller trolling motors and for anglers looking for a flexible placement that doesn't commit to a permanent stern or bow setup, side mounts can be incredibly effective. They offer a good balance for many multi-purpose kayaks, allowing for a Beginner Fishing Gear Checklist for Texas to include a motor without too much hassle.
Bow Mounts Front Mounts
Now we're talking about the Cadillac of kayak trolling motor setups, especially for serious anglers. A bow-mounted trolling motor is exactly what it sounds like: it attaches to the front (bow) of your kayak. These are typically larger, more powerful motors, often with advanced features like GPS Spot-Lock, which can hold your kayak in place with incredible precision. Brands like Minn Kota and Motorguide are popular here, offering models that are essentially scaled-down versions of what you'd see on a bass boat.
The main advantage of a bow mount is superior steering control. When you steer from the front, the kayak tracks much better, almost like pulling a wagon rather than pushing a wheelbarrow. This is fantastic for navigating tight spaces, holding specific structures, or fishing in windy conditions on open reservoirs like Lake Ray Roberts. Many bow-mounted motors are operated by a foot pedal or a remote control, leaving your hands free for fishing—a huge plus for Texas Largemouth Bass Fishing Guide techniques. However, bow mounts are generally more expensive, require a more involved installation, and are often designed for specific kayak models, particularly larger sit-on-tops or those with flat decks up front. They also necessitate more robust battery setups, perhaps a Best battery for a 36-volt trolling motor, and thoughtful wiring runs. If you're serious about hands-free, precise boat control for a dedicated fishing kayak, this is likely your ultimate goal, but it's definitely a bigger commitment.
Universal/DIY Mounts
Sometimes, your kayak just doesn't fit neatly into the categories above, or perhaps you're on a budget and love a good project. That's where universal or DIY mounts come in. These are often adaptable solutions that utilize existing features on your kayak, like gear tracks, or involve a bit of creative fabrication.
Universal mounts might consist of a simple crossbar system that spans your kayak, or brackets designed to fit various hull shapes. The beauty of these is their flexibility; you can often position your motor exactly where it feels most comfortable or effective for your specific kayak and fishing style. Many anglers get creative, using PVC pipe, marine-grade plywood, or aluminum stock to build their own custom solutions. The key here is ensuring structural integrity and proper sealing if you're drilling holes. While a DIY approach can save money and allow for ultimate customization, it requires a good understanding of marine hardware, weight distribution, and safety. You don't want your motor wobbling off in the middle of a choppy day on Lake Texoma! Always over-engineer these solutions and test them thoroughly in calm water first. You might find great universal mounting hardware kits at stores like Bass Pro Shops, or even components on Amazon that can be adapted for your project.
| Mount Type | Primary Placement | Pros | Cons | Ideal For |
|---|---|---|---|---|
| Transom | Stern (Back) | Simple, stable, easy motor attachment | Can interfere with rudder, weight distribution at stern | Recreational kayaks, general cruising, calm water |
| Side | Mid-Kayak (Gunwale) | Frees bow/stern, accessible controls | Can obstruct paddling, less direct steering | Smaller kayaks, flexible placement, light motors |
| Bow | Bow (Front) | Superior steering, hands-free operation | Complex installation, higher cost, heavier motor needed | Dedicated fishing kayaks, precision control, windy conditions |
| Universal/DIY | Flexible | Highly customizable, budget-friendly | Requires engineering skill, potentially less stable | Unique kayaks, custom needs, budget-conscious anglers |
Key Factors to Consider When Choosing a Mount
Alright, now that you know the basic flavors of mounts, let's talk about what really matters when you're trying to pick one out. It's not just about what looks cool; it's about what works best for your kayak, your motor, and your particular way of fishing.
Your Kayak's Design and Material
This is probably the single most important factor. Not all kayaks are created equal, especially when it comes to adding a motor.
- Sit-on-Top Kayaks: These are often the easiest to motorize. Many have flat areas at the stern or bow, or integrated gear tracks (like the popular YakAttack GearTrac or similar systems) that make attaching a mount relatively straightforward. Their open deck design makes running battery cables and accessing attachment points much simpler. Look for models designed with motorization in mind, perhaps with dedicated transom plates or reinforced areas. For example, some fishing-specific sit-on-tops from brands like Hobie or Native Watercraft come with pre-drilled or reinforced spots for specific motor mounts.
- Sit-in Kayaks: These present more of a challenge. Their enclosed cockpit means less open deck space for mounting and often less structural rigidity at the stern or bow. Side mounts might be an option, but often a custom stern mount that extends well beyond the rudder is required. Wiring for batteries can also be more complicated, often requiring careful routing through bulkheads or scuppers, all while ensuring everything remains watertight.
- Pedal Drive Kayaks: These are a unique beast. Since you're already using your legs for propulsion, adding a motor is usually about hands-free positioning or getting to your spot faster. Many pedal drives have a scupper hole designed to accept a transducer, which can sometimes be adapted for a specific motor mount. More commonly, you'll see bow-mounted motors on these, or specialized transom mounts designed to work around the rudder and pedal drive system. Always check with your kayak manufacturer first for compatible options. For many pedal-drive users, the goal is often to free up hands for fishing, making a bow-mounted option with remote control the most desired.
- Kayak Material: Most kayaks are made of polyethylene, a durable plastic that's relatively easy to drill into (with proper sealing, of course). However, some higher-end kayaks might be made of fiberglass or other composites. These materials require different drilling techniques and specific sealants to prevent damage and ensure a watertight seal. Always use marine-grade stainless steel hardware and generous amounts of marine sealant, especially if you're drilling through the hull. I can't stress this enough – a leaky hole is a bad hole!
Motor Size and Weight
Your choice of trolling motor mount isn't just about your kayak; it's also about the motor itself. Trolling motors come in various thrust levels (measured in pounds) and shaft lengths, which directly correlate to their physical size and weight.
- Thrust: A small, lightweight kayak might only need a 30-pound thrust motor, while a larger, heavier fishing kayak loaded with gear might benefit from 55 pounds of thrust or more. The more powerful the motor, the more robust its mount needs to be to handle the torque and vibrations. If you're looking at something like a Best trolling motor for a jon boat, that mount will be significantly different from a kayak mount.
- Weight: A heavier motor will put more stress on the mount and the kayak itself. You need a mount that can safely support the motor's weight without flexing, cracking, or causing instability in your kayak. Distributing this weight wisely is crucial. For instance, putting a heavy transom-mounted motor on a short, light kayak could make the stern sit too low and affect handling.
- Shaft Length: Trolling motors have different shaft lengths to accommodate various transom heights. While less critical for mounts that elevate the motor, it's still something to consider for water depth. You want the propeller to be consistently submerged without hitting the bottom or becoming inefficient due to being too close to the surface. Most kayak-specific motors or those adapted for kayaks tend to have shorter shafts.
Always check the manufacturer's recommendations for both your kayak and your trolling motor regarding compatible mounts and maximum weight capacities. Overloading or using an incompatible mount is not only inefficient but can also be downright dangerous, potentially damaging your kayak or causing the motor to detach on the water.
Fishing Style and Water Conditions
How and where you fish in Texas will play a huge role in your ideal mount choice.
- Calm Lakes vs. Choppy Bays: If you're primarily fishing calm, protected waters like a small pond in the Texas Neighborhood Fishin' program or a tranquil cove on Lake Conroe, a simpler transom or side mount might suffice. These conditions are forgiving. However, if you're venturing into open waters, large reservoirs like Sam Rayburn Reservoir, or the often-choppy bays of the Texas coast (think Galveston Bay or Matagorda Bay), you'll need a mount that can withstand more abuse. A sturdier, more secure mount is essential to prevent the motor from bouncing or coming loose in waves. For Texas Saltwater Fishing Techniques that involve battling waves, a robust, well-secured mount is non-negotiable.
- Target Species and Techniques:
- Bass Fishing: If you're primarily a bass angler, especially one who likes to work specific structures or hold precisely on a drop-off, a bow-mounted motor with GPS Spot-Lock is often the holy grail. It allows for hands-free fishing, precise boat control, and quietly approaching fish. This is invaluable when you're trying to fish those submerged brush piles on Lake Fork.
- Crappie/Catfish Fishing: For crappie or catfish, where you might be drifting or holding over a brush pile, a transom or side mount can be perfectly adequate. These styles often involve less constant repositioning and more stationary fishing. You might just need enough thrust to get to your spot and make minor adjustments.
- Wade Fishing Support: Sometimes, a trolling motor isn't for constant propulsion but for getting to your wade-fishing spot faster in the shallow bays, then anchoring or beaching the kayak. In this case, a sturdy, quick-release side or transom mount works well, allowing you to easily remove the motor once you're in the water.
- Speed vs. Control: Are you looking to get from point A to point B quickly, or do you prioritize slow, precise maneuvering? Bow mounts generally offer the best control, while transom mounts are often good for direct propulsion. Your mount needs to support your primary need.
Consider the typical conditions you'll face. Will you be dealing with strong currents on a river like the Trinity River, or fighting prevailing winds on a big lake? Your mount needs to be up to the task.
Ease of Installation and Removal
Finally, think about how much time and effort you want to put into attaching and detaching your motor.
- Permanent vs. Quick-Release: Some mounts are designed for semi-permanent installation, meaning you'll likely leave the brackets on the kayak even when the motor isn't attached. Others feature quick-release mechanisms that allow you to take the entire mount and motor off easily. If you frequently transport your kayak on a roof rack or inside a vehicle, a quick-release system can be a huge convenience. If your kayak lives on a trailer or at a dock, a more permanent setup might be fine.
- DIY Skill Level: Are you comfortable drilling holes in your kayak, running wiring, and sealing everything properly? Or do you prefer a bolt-on solution that requires minimal modification? Be realistic about your own handy-person skills. While a custom DIY mount can be rewarding, a poorly installed one can lead to leaks, damage, or even loss of your motor. If you're not confident, it's always better to opt for a professionally designed and fitted mount or seek assistance.
- Battery Considerations: Don't forget the battery! How will it be stored, secured, and connected to the motor? Some mounts integrate battery trays or have clever cable management solutions. You'll want to think about where your Best battery for a 24-volt trolling motor will sit and how the cables will reach the motor without getting tangled or creating a tripping hazard. For more information, check out How long does a trolling motor battery last.
Popular Trolling Motor Mount Solutions and Brands
Now that we've covered the crucial considerations, let's dive into some of the common solutions and where you might find them.
Dedicated Kayak Brand Mounts
Many of the big players in the kayak world have recognized the demand for motorization and offer proprietary mounts designed specifically for their own kayak models. This is often the safest and most reliable route if your kayak brand offers one.
- Perfect Fit and Integration: When a mount is designed by the kayak manufacturer, you can usually expect a perfect fit. They've accounted for hull contours, structural integrity, and often even aesthetics. For example, Old Town kayaks, especially their Predator series, often have dedicated mounts that integrate seamlessly into the stern, sometimes even allowing for hands-free steering with a foot pedal. Hobie, known for its pedal drives, offers specific motor mounts that work around their unique systems. Native Watercraft also has integrated options for their Slayer Propel models.
- Warranty and Support: Using a manufacturer-approved mount often means your kayak's warranty remains intact, and you'll have customer support specifically tailored to your setup. This peace of mind is invaluable, especially when you're making a significant modification to your kayak.
- Cost vs. Value: While these dedicated mounts might sometimes carry a higher price tag than a generic aftermarket option, the guaranteed fit, reliability, and peace of mind often justify the investment. You're paying for engineering and testing that ensures compatibility and safety.
Before looking at universal options, always check your kayak manufacturer's website or contact their customer service to see if they offer a specific trolling motor mount for your model. It often saves a lot of headaches down the line.
Aftermarket Mounts for Versatility
If your kayak manufacturer doesn't offer a specific mount, or if you're looking for something more universal and adaptable, the aftermarket is brimming with options. These mounts are designed to be more generic, fitting a wider range of kayak types, often utilizing track systems or clamping directly onto the gunwales.
- Types of Aftermarket Mounts: You'll find a variety of transom-style brackets, side mounts, and even some adaptable bow-mount systems. Many rely on universal track mounts, like those from YakAttack or Wilderness Systems, which allow for tool-free adjustment and removal. These often use heavy-duty plastic or aluminum construction, designed to be robust yet lightweight.
- Where to Find Them: Major outdoor retailers are a great starting point. Stores like Bass Pro Shops and their Cabela's counterparts stock a wide range of kayak accessories, including various trolling motor mounts. They'll often have display models or knowledgeable staff who can guide you. Online, Amazon is another treasure trove, offering everything from simple clamp-on brackets to more elaborate track-mounted systems. Just be sure to read reviews and check compatibility carefully, as "universal" doesn't always mean "fits absolutely everything."
- Considerations for Aftermarket: While offering great flexibility and often more competitive pricing, aftermarket mounts require you to be a bit more vigilant about fit and quality. Look for reputable brands known for marine accessories. Ensure the materials are marine-grade (stainless steel, UV-resistant plastics) to stand up to the Texas sun and potential saltwater exposure. Always double-check dimensions against your kayak and motor specifications.
DIY and Custom Solutions
For the truly adventurous and handy angler, building your own custom mount or heavily modifying an existing one can be a rewarding project. This path offers ultimate customization but requires careful planning and execution.
- Why Go DIY?
- Unique Kayak Designs: Sometimes, your kayak just has an odd shape, and no off-the-shelf mount seems to fit well. A custom solution can be tailored to its exact contours.
- Specific Fishing Needs: You might have a very particular placement in mind for your motor that isn't addressed by commercial mounts.
- Budget-Friendly: If you have the tools and materials on hand, a DIY mount can often be more economical than purchasing a specialized commercial product.
- Common DIY Materials: PVC pipe, marine-grade plywood (sealed and painted), aluminum angle, and even cutting boards have all been repurposed into kayak motor mounts. The key is structural integrity. Don't use flimsy materials that will flex under the motor's power.
- Safety First: If you're going the DIY route, safety is paramount.
- Reinforcement: Ensure any points where the mount attaches to your kayak are reinforced, especially if you're drilling through plastic. Backing plates made of aluminum or stout plastic can distribute stress and prevent cracking.
- Sealing: Use marine-grade sealants (like 3M 5200 or similar products) generously around any holes you drill to prevent water intrusion. A leaky kayak is no fun.
- Testing: Always test your DIY mount in calm, shallow water before taking it out on a serious fishing trip. Give it a good push and pull to ensure it's rock solid.
- Weight Distribution: Remember that adding a motor and battery will shift your kayak's center of gravity. Test how your kayak handles with the added weight and adjust placement if necessary to maintain stability.
- Inspiration and Resources: Many online forums and YouTube channels are dedicated to kayak fishing modifications. You can find a wealth of ideas and how-to guides from fellow anglers who have tackled similar projects. Just be discerning about the advice you follow; always prioritize safety and marine-grade standards.
Installation Tips and Maintenance for Your Mount
You've picked out the perfect mount, congratulations! But the job's not over yet. Proper installation and ongoing maintenance are crucial for safety, performance, and the longevity of your gear.
Step-by-Step Installation Advice
While specific instructions will come with your chosen mount (and you must read them!), here are some general tips to ensure a smooth installation, especially if you're drilling into your kayak:
- Gather Your Tools: Have everything you need ready: drill, appropriate drill bits (start small and increase size gradually), marine sealant, stainless steel hardware (bolts, nuts, washers), wrenches, screwdrivers, a measuring tape, and a marker.
- Plan Your Placement Carefully: Before drilling anything, dry-fit the mount. Sit in your kayak with the mount and motor in place. Is the motor tiller within easy reach? Does it interfere with paddling or your fishing movements? Is the propeller clearing the hull? Mark all your drill points precisely. Measure twice, drill once!
- Protect Your Kayak: Place a tarp or old blanket under your kayak to catch shavings and protect its finish.
- Drill with Care: Use a sharp drill bit. For plastic kayaks, a slow speed and steady pressure are best to avoid melting the plastic. Clean up any plastic burrs with a utility knife or sandpaper.
- Seal Everything Watertight: This is CRITICAL. Apply a generous bead of marine sealant around each hole and on the underside of bolt heads and washers before tightening them down. This prevents water from seeping into your kayak's hull, which can lead to a host of problems, including mold, bad odors, and even compromised flotation.
- Use Marine-Grade Hardware: Never use regular steel screws or bolts in a marine environment; they will rust quickly. Always use stainless steel (316 grade is best for saltwater) or other corrosion-resistant hardware.
- Don't Overtighten: While you want the mount to be secure, don't crank down bolts so hard that you deform or crack your kayak's plastic hull. Snug them firmly, but avoid excessive force.
- Test Thoroughly: After installation, if possible, fill your kayak with water or spray it down liberally with a hose (especially around new drill points) to check for any leaks before you even hit the water. It's better to find a leak in your driveway than on the lake.
Securing Your Motor and Battery
Once your mount is installed, you still need to ensure your motor and its power source are properly secured.
- Motor Security: Most transom and side mounts involve clamping the motor directly to the mount. Ensure these clamps are tightened firmly. Many anglers also use a secondary strap or bungee cord as a safety measure, just in case the clamps loosen from vibration. Bow-mounted motors usually have a specific locking mechanism; always ensure it's fully engaged.
- Battery Placement and Security: Your battery is heavy, and it needs to be placed in a stable location where it won't shift around. Ideally, this is in a dedicated battery box or a milk crate that's secured to the kayak (often with bungee cords or straps to a deck pad eye or track system).
- Weight Distribution: Try to place the battery as close to the center of the kayak as possible to maintain stability. Avoid putting it all the way in the bow or stern unless your kayak is specifically designed for that.
- Wiring: Route your battery cables neatly and securely, using cable ties to keep them out of the way. Avoid loose wires that can get tangled, caught, or tripped over. For more in-depth information on powering your motor, you might want to look into Best battery upgrade for a trolling motor in Texas summer heat or Best battery for a 24-volt trolling motor.
- Water Protection: Always store your battery in a waterproof or highly water-resistant box, especially in a kayak where splashes are inevitable. A sudden dunk could ruin your battery and leave you stranded.
- Emergency Kill Switch: Consider adding an emergency kill switch that you can easily access. This is an important safety feature that allows you to instantly cut power to the motor if something goes wrong.
Maintenance for Longevity
Your trolling motor mount, like all your fishing gear, needs a little love to keep it in top shape.
- Rinse After Every Use: Especially if you're fishing in saltwater (like off the Texas Gulf Coast), rinse your mount and motor thoroughly with fresh water after every trip. This helps prevent corrosion.
- Inspect Regularly: Before and after each trip, give your mount a quick once-over. Check all bolts, screws, and clamps to ensure they are tight. Look for any signs of cracking, stress, or wear on the mount itself or where it attaches to your kayak.
- Lubricate Moving Parts: If your mount has any moving or articulating parts, apply a marine-grade lubricant periodically to keep them operating smoothly.
- Protect from UV Damage: The intense Texas sun can degrade plastics and other materials over time. If you store your kayak outside, consider covering the motor and mount or removing them and storing them indoors when not in use. This goes for the kayak itself too, as direct sunlight can shorten the lifespan of your Best Kayaks for Texas Fishing.
- Check Electrical Connections: Periodically inspect your battery terminals and motor connections for corrosion. Clean them with a wire brush and apply dielectric grease to prevent future corrosion. This ensures optimal power delivery and helps prolong the life of your battery, crucial for understanding How long does a trolling motor battery last.
By choosing the right mount for your specific setup and taking the time for proper installation and maintenance, you'll ensure years of reliable, effortless propulsion on your Texas fishing adventures.
Disclaimer
This article is for general informational purposes only and does not constitute professional advice. Laws, prices and regulations vary by location and change over time. Consult a qualified professional for guidance on your specific situation.