Best budget fish finder for beginners
Let's face it, when you're just getting into fishing, or even if you've been at it for a while but never invested in much gear, the idea of a fish finder can feel overwhelming. You see those high-tech setups on TV, costing an arm and a leg, and you might think, "That's not for me." But the truth is, you don't need to break the bank to get a really effective, beginner-friendly fish finder that will drastically improve your chances on the water. This guide is all about helping you cut through the noise and find an affordable, reliable fish finder that's perfect for starting your angling adventures in Texas.
Why a Fish Finder is a Game Changer for Beginners
You might be thinking, "I've always fished without one, why start now?" Or maybe you're worried it's too complicated. Trust me, I've been there. For years, I relied on pure luck and local knowledge, and while that has its place, a fish finder opens up a whole new world of understanding what's happening beneath your boat or kayak. It's not about taking the "skill" out of fishing; it's about providing you with crucial information that helps you make smarter decisions.
Understanding the Underwater World
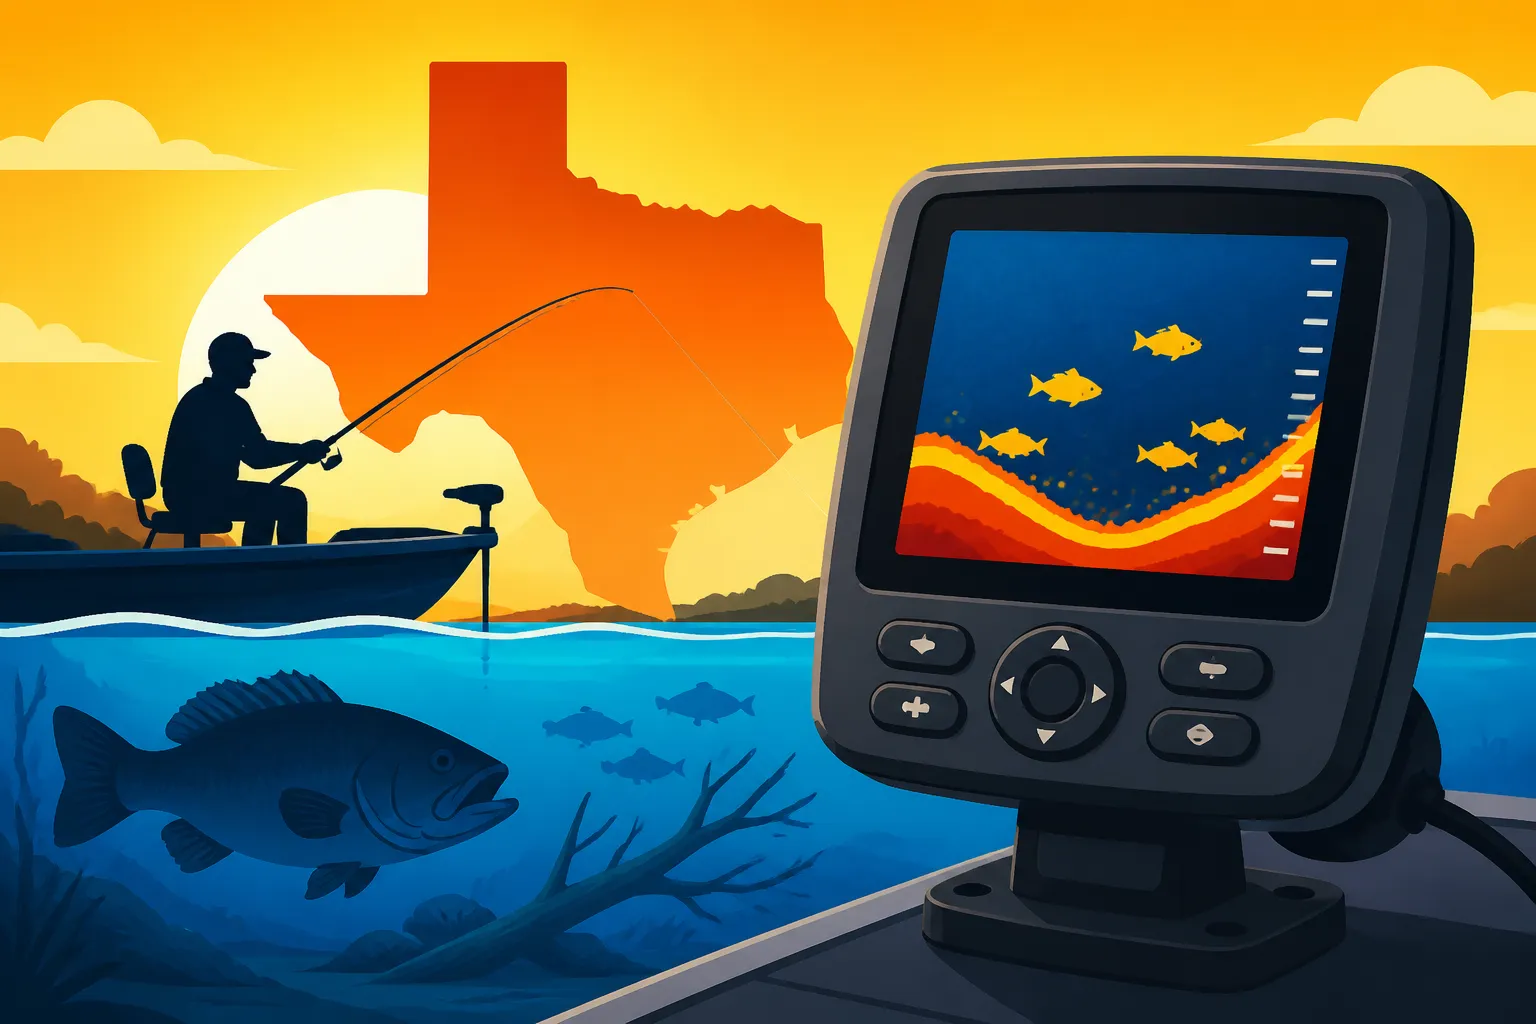
Imagine being able to "see" the bottom contours, sudden drop-offs, submerged brush piles, or even that old sunken rowboat you never knew was there. Without a fish finder, you're essentially blind to these critical structures that fish love to inhabit. Bass, crappie, catfish, and even redfish in the bays all relate to structure and changes in depth. A budget-friendly fish finder, even a basic one, will reveal these hidden gems.
For instance, you might be casting aimlessly into open water on a big lake like Lake Fork, wondering where the bass are hiding. A simple down-imaging or 2D sonar unit can show you that perfect submerged creek channel or a school of baitfish congregated around a thermocline. Suddenly, your "luck" turns into targeted effort, and that's incredibly satisfying. Knowing where the fish might be allows you to present your bait more effectively, rather than just hoping for the best. It's a fundamental step in developing your understanding of How to use a fish finder for bass fishing.
Identifying Fish and Bait
One of the coolest things about a fish finder, even a basic one, is its ability to show you actual fish. Now, it won't show you a perfectly rendered image of a largemouth bass with a lure in its mouth, especially on a budget unit. But it will show you arches or distinct shapes that indicate fish. More importantly, it can show you schools of baitfish, which is often a stronger indicator of where predator fish are lurking than seeing individual fish arches.
Think about a morning out on Lake Whitney for striped bass. If you can see clouds of baitfish suspended at a certain depth, you know exactly where to drop your jig or troll your umbrella rig. Without that visual, you're just guessing. For beginners, this immediate feedback – seeing fish or bait on the screen and then getting a bite – can be hugely encouraging. It helps you connect the dots between what you see on the screen and what's happening on your line. It builds confidence and teaches you to "read" the water in a whole new way.
Key Features to Look for in a Beginner-Friendly Fish Finder
When you start looking at fish finders, the options can be overwhelming. There are so many models, each touting a different array of advanced features. But for a beginner on a budget, you really only need to focus on a few core capabilities. The goal here is to get maximum bang for your buck without paying for features you won't use or understand yet.
2D Sonar and Down Imaging
These are the bread and butter of most budget-friendly fish finders, and honestly, they're often all you need to start.
- 2D Sonar: This is your classic sonar view, displaying fish as arches and showing you the bottom contour. It's fantastic for finding schools of fish, identifying major changes in depth, and marking cover like standing timber or rock piles. It's typically very easy to interpret once you understand the basics. For example, if you're looking for Texas Crappie Bag Limits around brush piles, a clear 2D sonar can show those structures and the crappie holding tight to them.
- Down Imaging (or DownScan, ClearVü, etc.): Many entry-level units now include some form of down imaging, and it's a huge step up from just 2D sonar for structure identification. Down imaging uses a higher frequency, narrower beam to give you a picture-like view directly beneath your boat. You can literally see tree limbs, rock formations, and even individual baitfish with incredible clarity. This isn't just about finding fish; it's about understanding why fish are in a certain spot because you can see the precise structure they're relating to. It's invaluable for learning How to Fish Deep Structure in Texas Reservoirs.
When evaluating units, look for one that offers both 2D sonar and down imaging. The combination gives you both the broad view (2D) and the detailed view (down imaging), which is perfect for understanding the full picture.
Screen Size and Resolution
You don't need a giant, cinematic display, but a decent screen size and resolution are important for clarity. Trying to read tiny details on a postage-stamp-sized screen is frustrating, especially in bright Texas sunlight or if you're wearing polarized sunglasses.
- Screen Size: Aim for at least a 5-inch screen if possible. Many excellent budget units come in this size. A 7-inch screen is even better if your budget allows, as it offers a significantly larger viewing area without a huge jump in price. Anything smaller can make distinguishing arches or structure difficult, especially from a distance or on a rocking boat.
- Resolution: This refers to the number of pixels on the screen (e.g., 480×272, 800×480). Higher numbers mean a sharper image. While you won't get retina-display quality on a budget unit, look for the highest resolution you can afford within your chosen screen size. A higher resolution makes it easier to differentiate between a submerged log and a school of baitfish, reducing guesswork.
Don't underestimate the importance of a clear display. It doesn't matter how many fancy features a fish finder has if you can't clearly see what it's trying to tell you.
GPS and Mapping (Optional but Recommended)
For beginners, built-in GPS and basic mapping capabilities might seem like a luxury, but they are incredibly useful and often come on budget models these days.
- GPS: This allows you to mark waypoints – specific spots where you caught fish, found good structure, or want to return to later. Imagine finding a killer brush pile for crappie, marking it, and then being able to navigate right back to it next time. This is invaluable, especially on large, unfamiliar Texas lakes or Best Texas Lakes for Family Fishing. It saves you so much time and effort compared to trying to remember landmarks on the shore.
- Basic Mapping: Many units come with a base map, showing basic outlines of lakes and rivers. Some even allow for adding more detailed lake maps later, though these often come with an additional cost. Even a simple breadcrumb trail on a blank map, showing where you've been, can be a huge help for navigation and understanding how you've covered an area. Being able to see your boat's position on a map, even a rudimentary one, while simultaneously viewing the sonar, ties everything together perfectly.
| Feature | Beginner Priority | Why it Matters |
|---|---|---|
| 2D Sonar | Essential | Shows fish arches, bottom contour, schools of bait. Easy to interpret for quick reads. |
| Down Imaging | High | Provides photo-like detail of structure directly below the boat (trees, rocks). Great for understanding cover. |
| Screen Size (5-7") | High | Larger screens improve visibility and make it easier to read details, especially in bright sun. |
| Screen Resolution | High | Higher pixel count means clearer, sharper images of fish and structure. |
| Built-in GPS | Recommended | Mark waypoints for productive spots, navigate back to them. Essential for consistency. |
| Basic Mapping | Recommended | Helps with navigation, understanding your path, and relating sonar data to locations. |
| Side Imaging | Low (for budget) | Shows structure to the sides of the boat. Great, but adds significant cost and complexity for beginners. |
| Touchscreen | Low (for budget) | Convenient, but physical buttons are often more reliable in wet conditions and cheaper. |
| Networking/Link | Low (for budget) | Connects multiple devices. Unnecessary for a single, beginner unit. |
| High-Power Transducer | Medium | Better for deeper water, but standard transducers are fine for most shallow to mid-depth Texas fishing. |
Top Considerations for Texas Anglers on a Budget
Texas fishing offers such incredible diversity, from the vast freshwater reservoirs to the expansive saltwater bays. Your specific fishing environment will influence your best budget fish finder choice.
Freshwater vs. Saltwater Fishing
While many budget fish finders are "all-purpose," there are nuances to consider.
- Freshwater (Lakes & Rivers): For most Texas lakes like Lake Conroe or Sam Rayburn, a standard 2D sonar with down imaging is more than sufficient. You'll be looking for brush piles, creek beds, ledges, and submerged timber. The depths typically encountered are well within the capabilities of most budget units. If you're on smaller rivers or ponds, even a very basic portable unit might be all you need. The key here is clarity for distinguishing structure and fish holding tight to it. Don't forget to check out Texas Freshwater Fishing Regulations as you explore these waters.
- Saltwater (Bays & Nearshore): If you plan on fishing the Texas coast, say Galveston Bay or Matagorda Bay, for redfish and speckled trout, down imaging becomes even more crucial for identifying oyster reefs, grass beds, and subtle depth changes. While you might not be fishing incredibly deep, the clarity for shallow-water structure is paramount. Saltwater environments can also be tougher on electronics, so look for units with good water resistance ratings. For those wade fishing the flats, a portable unit or even a wrist-mounted option might be considered, though they offer limited features compared to traditional boat-mounted units.
The good news is that many reputable brands like Lowrance and Humminbird offer robust entry-level units that handle both fresh and saltwater conditions quite well.
Portability and Mounting Options
How you fish dictates how your fish finder should be mounted. Are you in a small jon boat, a kayak, or do you mostly fish from the bank or a pier?
- Permanent Mounts (Dash/Gimbal): Most traditional fish finders are designed for permanent installation on a boat's dash or a gimbal bracket. This means running power wires to your battery and mounting a transducer to your transom or trolling motor. This is the most stable and reliable option if you have a powered boat, even a small one like a jon boat. If you’re looking at Best Jon Boats for Texas Rivers, consider how easy a permanent mount would be.
- Portable Units: These are fantastic for kayaks, canoes, small aluminum boats without dedicated batteries, or even for ice fishing (though not common in Texas!). They often come with a small battery pack and a suction cup or clamp-on transducer. The trade-off is usually a smaller screen and less power, but the convenience is unmatched. Many kayak anglers love these for their versatility, especially those exploring Best Kayaks for Texas Fishing. You can even get castable sonar devices that pair with your smartphone, perfect for bank fishing or quick scouting, though their real-time performance is generally not as robust as a dedicated unit.
- Kayak Specific Mounts: For serious kayak anglers, there are specialized mounting solutions that integrate fish finders directly into the kayak's hull or on track systems, providing a cleaner setup than a portable clamp. Some even come with internal battery compartments.
When considering portability, think about your typical fishing trip. Do you want to set it and forget it, or do you need to be able to quickly deploy and pack up your gear?
Getting Started: Installation and First Use Tips
One of the biggest anxieties for beginners is often the installation process and then figuring out how to actually use the thing. Don't sweat it! Budget fish finders are designed to be relatively user-friendly.
DIY Installation for Beginners
Most budget fish finders come with everything you need for a basic installation. You'll typically find:
- The Head Unit: This is the screen and controls.
- The Transducer: This is the "eye" of the fish finder, sending and receiving sonar waves.
- Power Cable: Connects to your boat's 12V battery.
- Mounting Bracket: For the head unit.
- Transducer Mounting Hardware: Often a transom mount or a bracket for a trolling motor.
For most small boats or kayaks, you can absolutely do the installation yourself with basic tools.
- Power: The power cable usually has a red (+) and black (-) wire. Connect them directly to your 12V battery terminals. Many beginners use a small, dedicated marine battery for their fish finder, especially on kayaks or small jon boats. Make sure you include an inline fuse for safety.
- Transducer Placement: This is crucial. For transom mounts, it needs to be submerged in clear water, away from prop wash or anything that could create turbulence. For trolling motor mounts, it attaches directly to the motor's shaft. Read the manufacturer's instructions carefully for optimal placement; incorrect transducer placement is the most common cause of poor performance. On a kayak, you might even "shoot through hull" by mounting the transducer with silicone inside the hull, though this can slightly reduce signal strength.
- Cable Management: Secure all cables neatly to avoid snags or damage. Use zip ties or cable clips to keep things tidy.
Don't be afraid to watch a few YouTube videos specific to your model or a similar one. Many manufacturers, including those selling through Bass Pro Shops and Amazon, have excellent instructional videos. Take your time, and double-check your connections.
Basic Settings and Interpretation
Once installed, firing up your fish finder might present a lot of numbers and lines. Here's how to get started:
- Auto Mode: For beginners, start with the "Auto" or "Automatic Sensitivity" settings. Most modern fish finders do a surprisingly good job of adjusting sensitivity, depth range, and noise filtering on their own. As you get more experience, you can start to tweak these manually for better performance in specific conditions.
- Sensitivity: This controls how much detail the sonar picks up. Too low, and you'll miss fish. Too high, and you'll get a lot of clutter. In auto mode, the unit tries to find the sweet spot.
- Zoom: Learn how to zoom in on specific areas of the water column or the bottom. This can help clarify fish arches or structure you've identified.
- A-Scope (Real-Time Sonar): Many units have an A-scope display, which shows you the most recent sonar returns in a vertical column on the right side of the screen. This is a real-time view directly under the transducer and can be very useful for seeing fish or lures as they pass through the beam.
- Color Palettes: Experiment with different color palettes. Some people prefer warmer colors (reds/yellows) to indicate stronger returns (fish, hard bottom), while others like cooler colors. Find what works best for your eyes and conditions.
- Practice, Practice, Practice: The best way to learn is to use it. Spend time on the water, driving over known structure (like a boat ramp or bridge pilings), and compare what you see on the screen to what you know is there. Drop a heavy jig or weight down and watch it appear on the screen. The more you use it, the more intuitive it becomes. You'll quickly start to understand How to read a fish finder for bass.
It's tempting to mess with every setting right away, but resist the urge. Master the basics first, then gradually explore advanced options as you gain confidence.
Where to Find Your First Budget Fish Finder
Now that you know what to look for, where do you actually go to buy one? You've got a few solid options that cater well to beginners and budget-conscious shoppers.
Big Box Outdoor Retailers
Places like Bass Pro Shops are fantastic resources. They typically have a wide selection of fish finders, from entry-level to high-end, and often have staff on hand who can walk you through the differences.
- Pros:
- Hands-on Experience: You can physically see the units, check screen sizes, and feel the buttons. This is huge for judging ergonomics and clarity.
- Expert Advice: Sales associates often have personal experience with many models and can offer recommendations based on your specific Texas fishing needs (e.g., "This one is great for finding Texas White Bass Run Timing in rivers," or "Anglers love this for chasing redfish in the Galveston bays.").
- Installation Support: Some locations might offer or recommend installation services, or at least have all the accessory wiring, fuses, and mounting brackets you'll need.
- Return Policy: Generally good return policies if the unit isn't what you expected.
- Cons:
- Prices might sometimes be slightly higher than online-only retailers, though they often price match.
- Selection might be limited to a few major brands.
Bass Pro Shops is a great starting point, even if you just go there to look at the models in person before making a final decision elsewhere.
Online Marketplaces
Online retailers are incredibly convenient and often offer competitive pricing, especially for budget-friendly electronics.
- Pros:
- Vast Selection: You'll find almost every brand and model imaginable, allowing for extensive comparison.
- Competitive Pricing: Often the best place to find deals and sales, making it easier to stick to your budget.
- Customer Reviews: User reviews are invaluable for getting real-world feedback on a unit's performance, ease of use, and common issues. Look for reviews from other kayak or small boat anglers.
- Convenience: Shop from your couch and have it delivered directly to your door. Amazon, for example, is a huge marketplace for electronics, and you'll find plenty of fish finders there.
- Cons:
- No Hands-on: You can't physically examine the unit before buying. You're relying on pictures and specs.
- No Direct Support: You'll typically deal with the manufacturer directly for technical support or warranty claims, rather than a local store.
- Overwhelming Choices: The sheer number of options can be daunting for a beginner.
When buying online, focus on well-known brands that have a good reputation for reliability and customer service in the fishing electronics world. Read reviews carefully, and make sure the model you're looking at includes all the core features we discussed.
Conclusion: Don't Let the Tech Intimidate You
Investing in a budget-friendly fish finder is one of the smartest moves you can make as a beginner Texas angler. It transforms fishing from a guessing game into a more informed and strategic pursuit. You'll learn more about the waters you fish, understand fish behavior better, and ultimately, catch more fish.
Remember to prioritize 2D sonar and down imaging for clear underwater views, choose a screen size that's easy to read, and consider built-in GPS for marking those hot spots. Whether you're heading to Bass Pro Shops to see the units in person or browsing the vast selection on Amazon, there's a perfect budget fish finder out there waiting to revolutionize your fishing experience. Don't be intimidated by the technology; embrace it, and get ready to unlock a whole new level of success on the water.
Disclaimer
This article is for general informational purposes only and does not constitute professional advice. Laws, prices and regulations vary by location and change over time. Consult a qualified professional for guidance on your specific situation.